How to Grow Watermelons at Home in Containers (No Garden Needed) 🍉🌿
Imagine slicing open a sweet, juicy watermelon that you grew yourself — right on your balcony or patio! Even if you don’t have a big backyard, you can still enjoy this summer favorite. Watermelons may seem like they need a lot of space, but with the right container, soil, and care, they thrive beautifully in small spaces. Let’s explore how to grow these refreshing fruits in containers at home, step by step.
1. Choose the Right Watermelon Variety
Not all watermelons are suited for containers. Pick smaller or dwarf varieties that are easy to manage and mature quickly. Good options include:
- Sugar Baby (sweet and compact)
- Golden Midget (fast-growing and colorful)
- Mini Love (perfect size for pots)
These types are small enough to grow in a limited space yet still produce deliciously sweet fruit.
2. Select a Large, Deep Container
Watermelons have long roots, so your container should be at least 18–24 inches deep and 20 inches wide. A large plastic or fabric pot works best, as it allows proper drainage and prevents root rot. Make sure there are holes at the bottom to release excess water.
Tip: Place the container in a spot that gets 6–8 hours of sunlight daily — watermelons love warmth!
3. Use Rich, Well-Draining Soil
Fill your pot with a mix of:
- 2 parts garden soil
- 1 part compost or organic fertilizer
- 1 part sand or coco peat for drainage
This combination keeps the soil fertile, airy, and moisture-balanced — exactly what watermelon roots need.
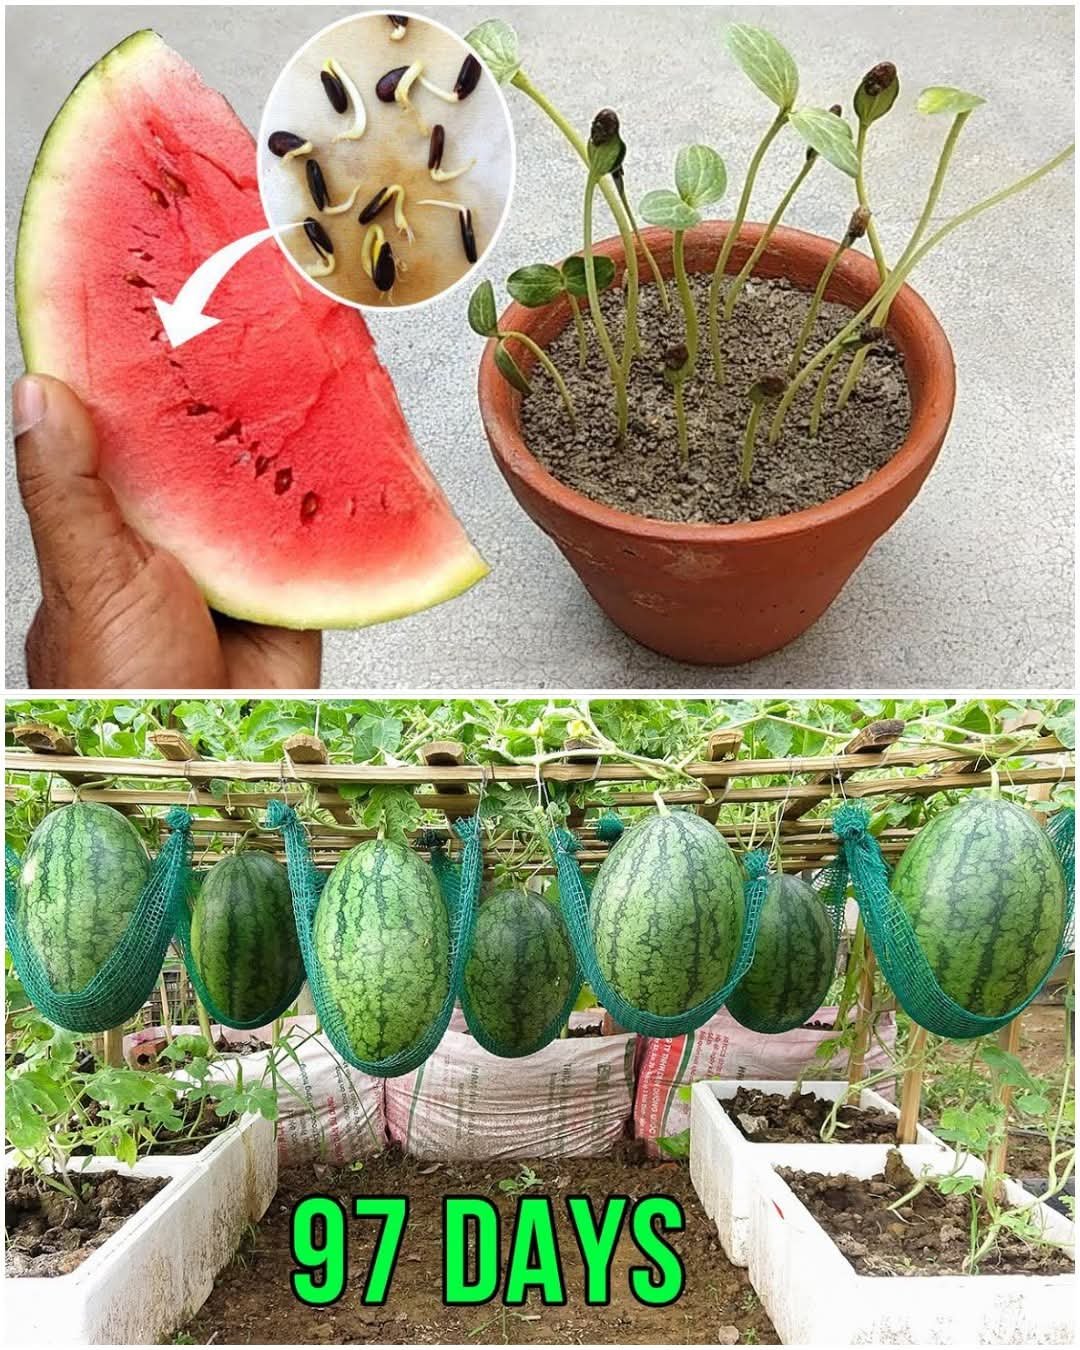
4. Planting the Seeds
- Sow 2–3 seeds in the center of the container, about 1 inch deep.
- After sprouting (around 7–10 days), keep the healthiest seedling and carefully remove the weaker ones.
- Water gently to keep the soil moist but not soggy.
5. Watering and Feeding
Watermelons are thirsty plants! Keep the soil consistently moist, especially during hot days. Avoid wetting the leaves to reduce fungal problems.

Every 2 weeks, feed your plant with a liquid fertilizer rich in potassium and phosphorus — this encourages healthy fruit formation.
6. Support and Training
If you’re short on space, you can train the vines upward using a trellis or net. Use soft ties to support the growing stems. When small melons appear, place them in cloth slings to hold their weight securely.
7. Pollination and Fruit Care
Watermelons need pollination to bear fruit. If you don’t see bees around, hand-pollinate by gently transferring pollen from male to female flowers using a small brush or cotton swab.
Once the fruits appear, reduce watering slightly so the sweetness can concentrate as they ripen.
8. Harvesting Your Homegrown Watermelon
In about 70–90 days, your watermelon will be ready! Look for these signs:

- The tendril near the fruit stem turns brown and dry.
- The underside of the melon changes from white to creamy yellow.
- When tapped, it sounds deep and hollow.
Cut it gently from the vine, chill it, and enjoy your own homegrown treat! 🍉
Final Tips for Success
- Keep your container in full sun for maximum sweetness.
- Rotate the fruit occasionally so it ripens evenly.
- Mulch the soil surface to retain moisture and control temperature.
Growing watermelons at home is easier than you think — all you need is sunlight, patience, and a little care. Whether on your balcony, terrace, or patio, you can enjoy the taste of summer straight from your container garden. 🌞